Floor Generator v2.10 for 3ds max 2013-2024
Info:
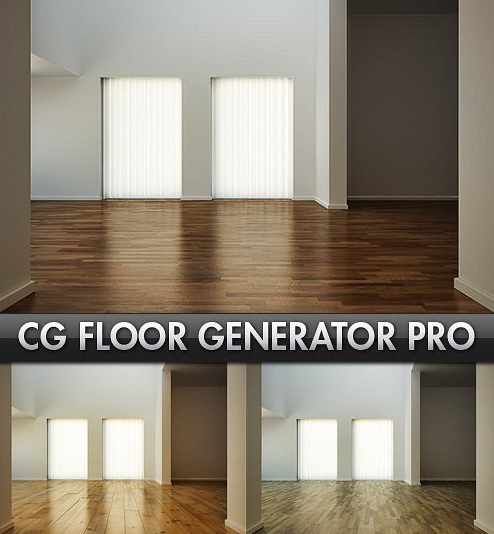
FloorGenerator is a plugin for 3ds Max (2013 to 2023) which generates floor objects consisting of individual boards which can easily be textured using MultiTexture. It’s a great tool if you’re doing architecture visualization and need to make floors that are NOT going to tile and that you can see up close without any pixilation.
Features:
- Floor Pattern – If you have the full version you can switch between the types of patterns in the “””Floor Pattern” Drop down menu.
Max Length – Controls the maximum length a board can be.
Min Length – Controls the minimum length a board can be. By default locked to the “Max Length”.
Spread – If you have boards with variable length the “Spread” setting will control the distribution between the two sizes, 0,5 the length is evenly distributed, a low Spread value creates a lot of long boards and only a few short ones, a high spread creates a lot of short boards and only a few long ones.
Max Width – Controls the maximum width a board can be.
Min Width – Controls the minimum length a board can be. By default locked to the “Max Width”.
Spread – Controls the distribution if there is variable width, for details read above.
Grout Len – Controls the width of the grout in the length direction.
Grout Wid – Control the width of the grout in the width direction.
Row Offset % – Controls how much each row of boards should be offset.
Extrude H – Controls the height of the floor.
Bevel H – Controls the height have the bevel along the edge of the board.
Outline – Controls the width of the bevel, by default it’s locked to the height in order to create a 45 degree bevel.
Settings specific to certain types of floors:
Herringbone, Parallel Boards – Controls how many boards there should be side by side.
Chevron, Angle – Controls the angle of the boards, don’t use too high angle, it might create A LOT of boards.
Basket Weave, Sub Boards – Controls how many boards there should be inside each square.
Hexagon, Radius – Controls the size of one hexagon tile, the radius is the size of the circumscribed circle. - Max Rotation – Controls how much each board can rotate around itself, it is restricted to not overlap other boards, if you don’t care about that read about “Max Overlap” below.
Min Rotation – Controls the minimum rotation, so should normally be set to 0 to randomly rotate between 0 and the value in “Max Rotation”.
Spread – Controls the distribution between Max and Min, if the spread value is low then only a few boards will be rotated with the maximum value, if it’s 0,5 the rotation is evenly distributed, and if it’s high more boards will be rotated with the Max value.
Max Offset X – Controls how much each board can move in the X direction, usually the length direction., it is restricted to not overlap other boards, if you don’t care about that read about “Max Overlap” below.
Min Offset X – Controls the minimum movement, so should normally be set to 0 to randomly move between 0 and the value in “Max Offset X”.
Spread – Controls the distribution of the movement, for details read above.
Max/Min Offset Y – Same principle as “Max Offset X” it just controls the other direction. This is by default locked to the X value to randomly move in both directions.
Tilt Settings – Same principle as the rotation and offset, tilt changes the angle of the top surface, this simulates floorboards or tiles that are laid uneven.
Max Overlap – By default the settings above will not allow boards to overlap, so to see the effect of random rotation or offset you need to have a relative large grout size so the boards have place to move around, if you don’t care about a bit of overlapping you can raise the “Max Overlap”. - Scale – This scales the entire floor up or down.
Direction – Controls the direction of the floor, change it to rotate all boards.
Seed – Change the seed of all the randomization.
Offset X – Moves all boards in the X direction.
Offset Y – Moves all board in the Y direction.
WeldThr – This welds vertices that are close to each other, if you are creating a floor with an irregular shape you might get very small boards at certain corners, the bevel might be bigger than the board and it will look weird, if you use the weld function you can sometimes eliminate the small boards. - All boards will receive their own UV mapping, the size of the mapping will always be identical to the size of the largest board.
UV Channel – Controls which channel the UV’s should use.
Random Flip Mapping U – Mapping will randomly be flipped of the U axis.
Random Flip Mapping V – Mapping will randomly be flipped of the V axis.
Random Offset U – If boards have variable size the mapping will be randomly offset so the center of the texture isn’t used every time.
Random Offset V – If boards have variable size the mapping will be randomly offset. - If you are creating very large floors the calculation can be very slow, so if you don’t want it to update every time a setting is changed you can set it to update manually.
- If you want to use the floor later you can save all the settings to a .ini file. When you load a floor it might be necessary to click update.
- • If Max is set to Meters the floor creation at the edges can be inaccurate.
• Creating a floor with A LOT of boards will take a very long time and will make it look like Max hangs, this can easily happen by dragging a spinner and setting it either to high or low. So be careful!
• When creating a chevron floor it is important “Max Length” is higher than “Max Width”, if not FloorGenerator will attempt to create a floor with infinite number of boards and crash.


